Fairy #30 Start to Finish Tutorial – Part 3
<< Part 1 | << Part 2
Blushing the sculpture 
When you doll is all completed and you are happy with everything it’s time to blush. Mix some Genesis flesh, red and white together to get a nice reddish fleshy tone then apply to the feet, knees, leg bend, thigh lines, belly button, ribs, side crease, under breasts, nipples, collarbone, arm creases, fingers, palms, back line, and butt.
Work the blush into those areas and then smooth out. If you use too much you can remove it with acetone. Add any extra features like freckles, tattoos, fingernails and such now.
When you are satisfied with the result cook for 10mins to heat set the paints.
Remember not to hold the sculpt when it’s finished cooking, even parts that have been cooked previously become soft and fragile again with each cooking.
You can repeat the process several times to build up layers if you are not happy with the final layer. Acetone can also be used to removed paint after the cooking process
Adding the Hair
Now that your doll is all finished and painted it’s time to add the hair. You should not be planning any baking after this process as it can dry out the hair, so if you are thinking of making any clay clothing then you should do that first.
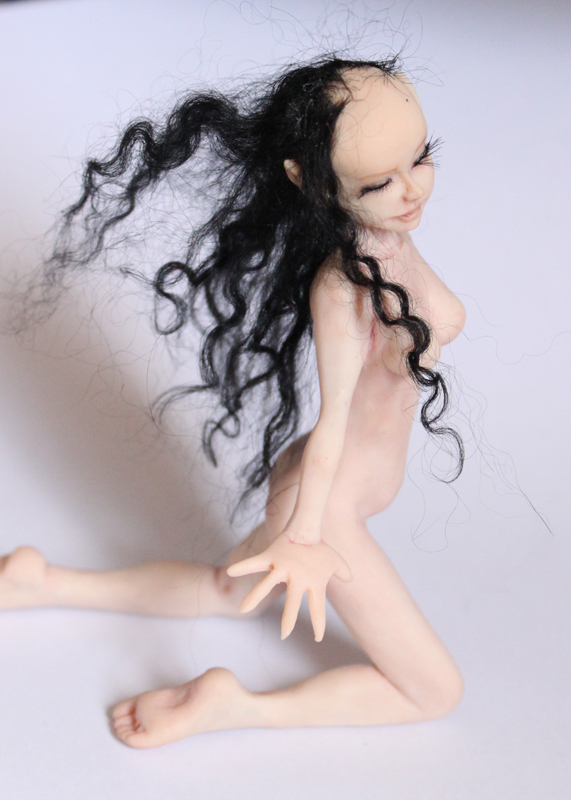
Apply a line of fabric glue from ear to ear across the back of the head. Cut a strip of hair and press into the glue.
Repeat twice more across the head. Ensure each layer overlaps the lower level.
Cut a small piece of hair and glue to the temples.
When cutting the hair make sure you work out how long it needs to be and then measure that from the wool ends. This preserves the fine ends. Try to avoid giving her a haircut.
For a split place a vertical line of glue, and then place the hair piece in it. Then before it dries use a toothpick to lay the hair back over the glue and press down. Repeat for the other side
If desired add a small hair piece to the front to create a fringe.
When the glue is all dry completely wet the hair.
Style with regular styling glue till you have it as you like.
Add in any embellishments such as mini cloth flowers.
Adding the Eyelashes
Eyelashes can be very frustrating to apply due to how small they are. Take each step slowly and if you fail just remove the lash and glue and try again.
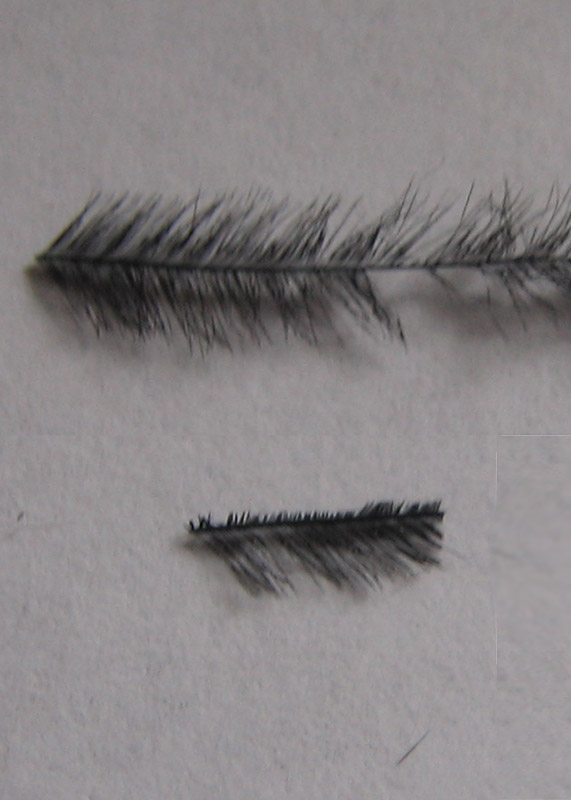
Prepare the feather by cutting away one side and cutting to size. Study the feather, there is an upside and a down side, and also it tends to bend more easily one way.
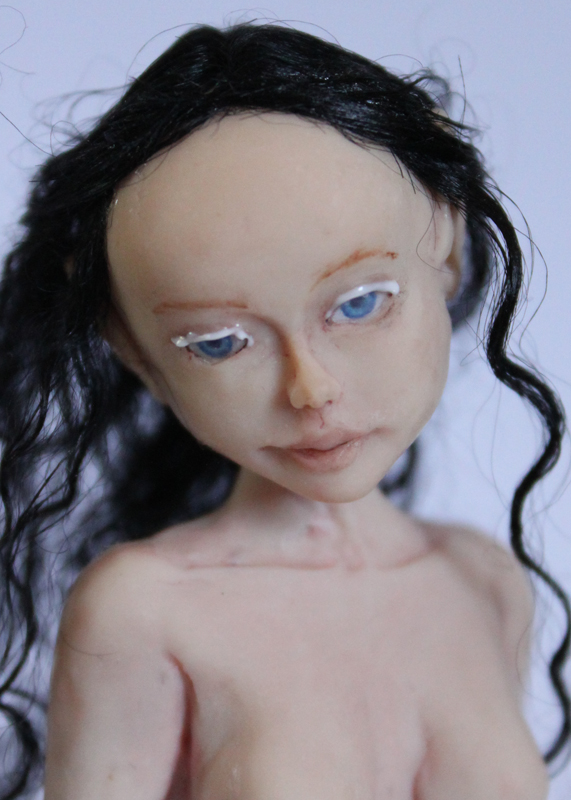
Using a toothpick apply line of glue to eyelid and then wait until the glue is transparent, this is the Ultimate Glue’s “cement” method.
When the glue is transparent put a bit of glue on the center of the lash you are appling and press into the glue on the eyelid.
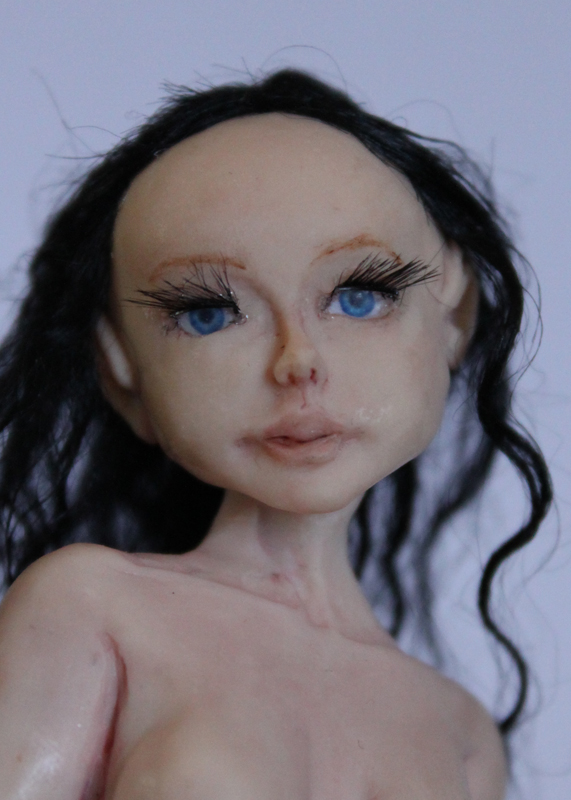
Now wait until it is well and truly stuck (I put it down and do something else in between) and then add a touch of glue in the corner of her eye and gently press the lash into it. Again wait until that has set and only then do the same for the outside of the lash.
If you try to rush these steps before they have dried you will find that you press down one side only to have the other side pop back up. So take your time here!
Once dry fluff feathers to suit. An attempt to do this before they are dry could result in them getting stuck to the glue.
Costume 
There are many different ways you can add a costume to your doll, this can include different materials such as clay clothing, cloth, tissue paper…anything you think up you can use.
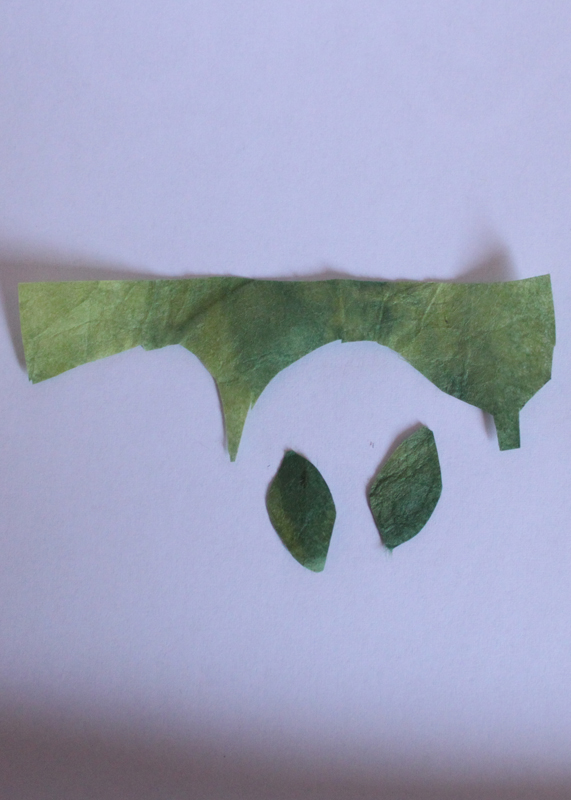
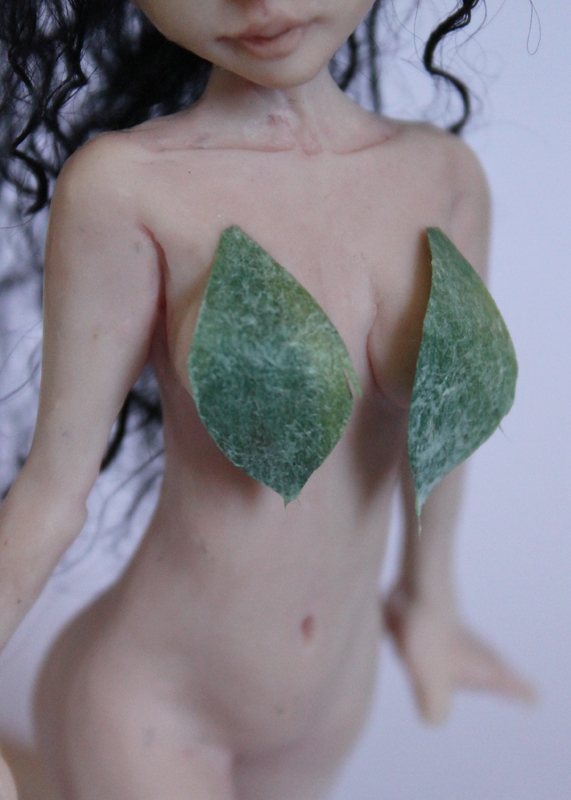
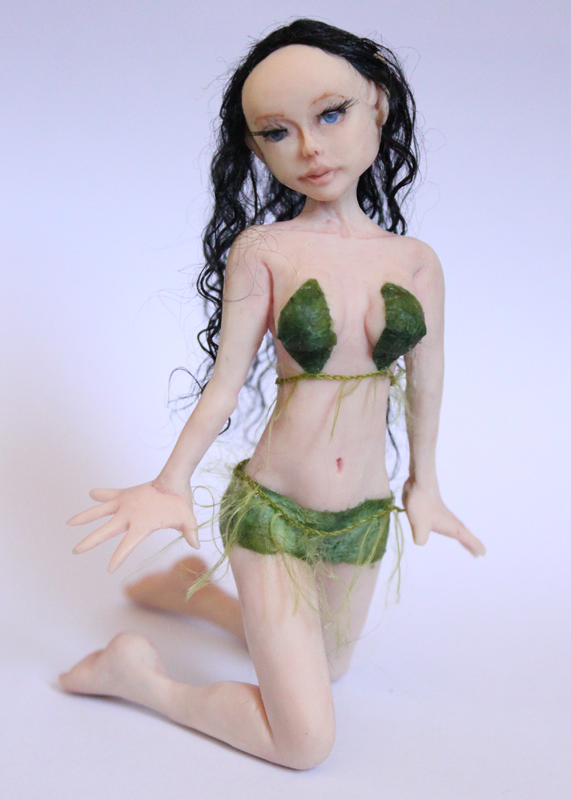
In this example we are going to make a bikini top and bottom out of tissue paper and then add some string for embellishment.
Tear or cut the a basic bikini design out of tissue paper, it doesn’t have to be exact as you can add to it bit by bit.
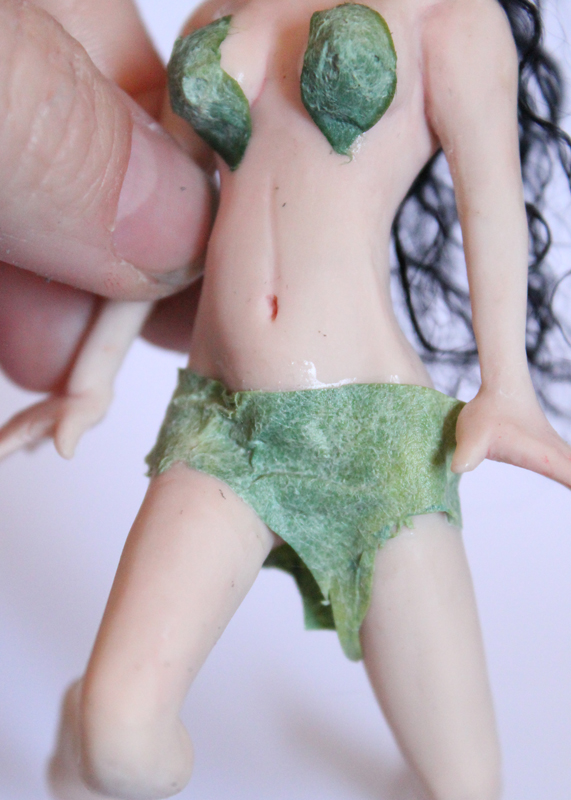
Make a mixture of white tacky glue and water. It doesn’t have to be thick.
Soak the tissue paper in the watery glue. Once soft carefully stick on the doll.
A paintbrush and also a pin is helpful to move the tissue paper to suit.
To curve just fold little pleats and press tissue paper together.
You can create a jagged edge look by pulling on the fibres with a pin.
When you are happy with the look allow to dry.
After a quick wash of her skin with warm soapy water you can add embellishments like ropes, ribbon or cord.
Use sting or paper to add feet and/or hand bracelets. Carefully placed decorations can hide parts you don’t like.
Wings 
Like the costume the wings can be made with an endless supply of materials, you are only limited by your imagination. These materials can include feathers, film, tissue paper, cloth, natural materials…. We are going to make our wings out of fantasy film, feathers and wire.
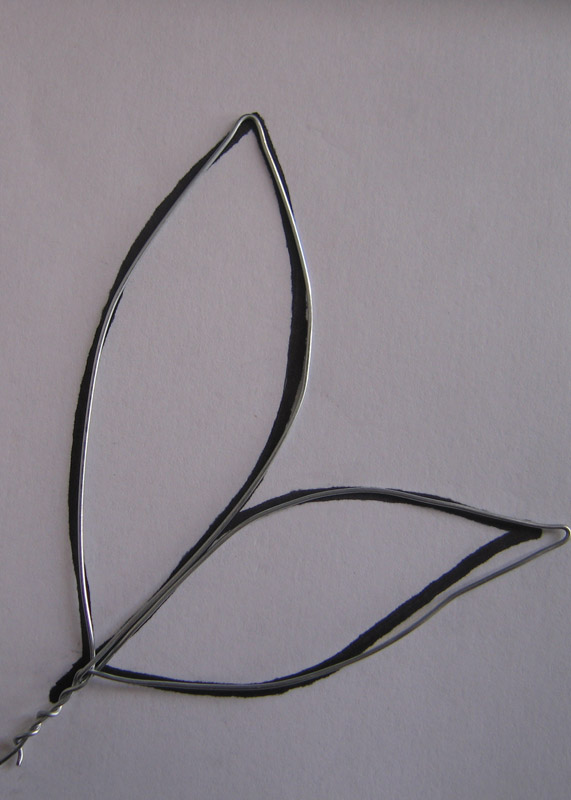
Tape a piece of fantasy film over your sketched out design.
Cut pieces of wire to match the design, bend to match the design and then place over design and tape down.
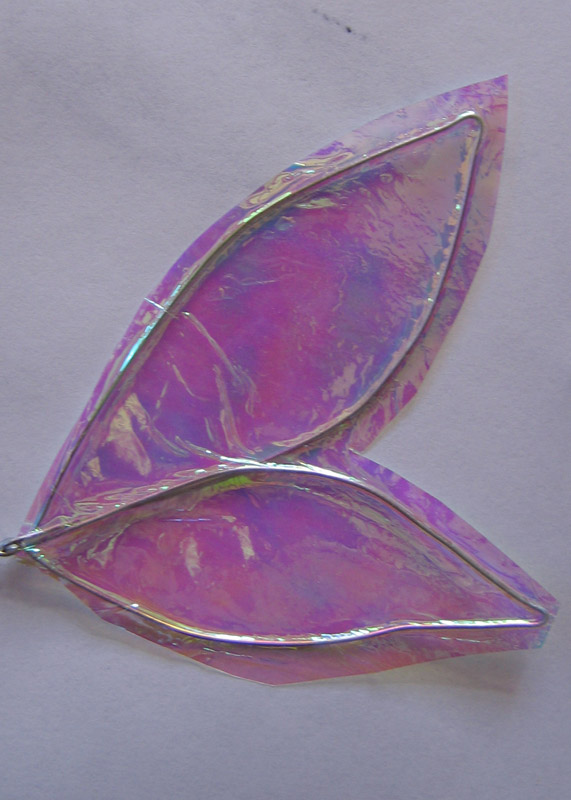
Cellotape another piece of film over top of the wire.
Cover with cloth and use iron to heat set the two pieces of film together.
Trim back film to match the design.
Use a soldering iron (or candle) to sizzle the ends and make holes.
When you have finished adding the holes to your wings glue a bit of fabric glue at the base of each wing (inside and outside) and add feathers to suit.
Drill a hole in the back of the fairy the size of your main wire. This process also allows you to see a sample of the clay inside your doll, if the clay comes out feeling at all wet then your doll is not cooked. It should be a powder.
Place the wings in the drilled holes and your doll is now complete!
Making a Base 
Bases can be made from a variety of materials, and can be decorated with rocks, fake grass, water features and such. If you would like to make your own simple base you can do so by following the steps below:
- Cut out a piece of pine to suit
- Cut out a thin piece of particle board slight bigger
- Plane or sand off edges on the pine piece of wood to create a nice beveled edge
- Glue pine and particle board pieces together
- Paint or varnish as required
- Maybe add a printed name tag with the dolls name, the sculptors name and the date the doll was created
Extra Notes, Links and acknowledgements 
If you have any questions or feedback please leave us a comment we would love to hear from you.
All the images and information within this tutorial remain the property of Doll Art by Julie. Please do not copy or redistribute in any way.
Acknowledgments
I would like to thank Linda for the creation of the easy to use eyelash technique. To visit Linda’s site please click here
Tips and Tricks 
Baking Tips
When it comes to baking nothing beats a convection oven. These ovens make it a lot harder to burn your dolls. Plus the glass sides mean you can easily see your doll as its cooking.
When cooking in either a convection oven or a standard oven place your doll on a cushion of polyfill ensuring all the parts of its body is supported. Then cover the entire sculpture with the polyfill creating a lovely warm cocoon that will protect the sculpture from heatspots. Never use a metal tray, and never have the doll directly under an element.
If you are baking in a normal oven you may find tiny parts like ears, fingers, and noses cook faster and can burn. To avoid this you can help protect them by placing a bit of wet tissue paper over them while cooking.
Always use a thermometer in your ovens, do not rely on your ovens temperature gauge being correct.
And lastly always remember dolls are very fragile when they are warm – even if they have been previously cooked and cooled. Each time the clay is warmed up it becomes fragile and can crack easily. So make sure to leave the doll in the oven with the door open till it’s cooled. My rule of thumb is I give it twice the amount of time to cool than it took to cook.
Living doll clay requires 15mins per 6mm cooked at 275° Fahrenheit or 130° Celsius.
Test your oven
If this if the first clay creation you have cooked in your oven, especially if it is a normal household oven, you can try this test. Make a quick hand shape, just a flattened ball of clay with some rolled spaghetti bits off it.
Place that in your oven with polyfil under and over it, and cook it for 30min. If you can – use a thermometer while it’s cooking to check the temp is right. Otherwise if you don’t have one at least this test will tell you if it’s not right.
Once its cooked and cooled have a look at it – is it burnt? Cut through it – is it too soft and easy to break? This may seem like a lot of work, but if it saves you burning a doll you have spent hours on it may be worth it, especially if you don’t have a thermometer.
Part Baking
If you are having issues with squishing parts you have already completed while working on new areas then doing a part bake may help you.
To part bake or not to part bake, it is an important question, but one only you can answer. The main reason you would part bake is to help stop squishing parts you have already completed while working on new areas. And for this reason it can certainly help new comers. Best way is to just do as much as you can before you feel like if you keep working on new parts you will destroy the completed sections. You may find this point moves further and further out as you do more dolls, or you may find you just prefer to part-bake at certain stages and not change from that. It is whatever works for you best.
However you should save the full 30min bake till once all the parts are in place. The reason for this is that the clay (especially the Beige) can darken with multiple full bakes, so bake no part more than 10mins until the final 30min bake. And always do the full 30min bake (more if your doll is big or the clay thick) never think that three 10 min bakes equals one 30 min bake, it does not! But do remember that when it’s only had 10 minutes it’s not cooked on the inside, so avoid any pressure or those partially cooked parts will crack.
How to hold a doll while sculpting her
Now having talked about part baking you still may find yourself squishing parts in between bakes. The reason for this is that you are not holding your doll right. So here is how to hold her while sculpting her torso:
Always know your safe spots! This could be her cooked head and the armature wire. If I am using my sculpting tool I hold it in my right hand, and hold her like in the image between her head and the wire end. If I am smoothing I smooth with my left hand while holding her, usually, upside down completely by the head, or again the head and armature hold (see the picture in Step 4 – Sculpting the Torso).
This is something that does come naturally when you have done a few dolls, so just be patient and trust me when I say every doll maker has been in your shoes before. You can also try hanging the doll while sculpting to avoid squishing and dirt
Fixing a Crack
Everyone will experience a crack now and then, they can be avoided through the techniques already mentioned in this tutorial, but if your doll does develop one then this is what you need to do:
- Cut away the clay around the crack ensuring you go all the way to the bottom of the crack
- Keep the sides you cut away angled to allow for a seamless fix
- Brush the sides you cut away with TLS – Translucent Liquid Sculpey – this will help the fresh clay bond with the cooked clay
- Add the fresh clay deep into the crack and smooth down and add any details as required
- Cook for 15mm depending on depth of crack
Avoids Cracks!
The most important thing to avoid cracks is to cook your doll right. The exact temperature is extremely important. Too hot and it will burn (especially small tips like fingers). Too cold and your doll will not be cooked and you will experience lots of trouble with broken fingers, cracked necks and knees…
So make sure you get that temperature right! When you get it right the doll will feel rock hard
Final Thoughts
That brings us to the end of this tutorial.
You can also view the full gallery of images for this tutorial here. Thanks for reading, and please leave us a message in the comments below.








what temps do you use for baking and how long.what abou t using a toaster oven,i tried before but i don;t think controling the temp was good enough,unless it was me
thank you, lois
Hi Lois. Some clays have different temps, so you should always read the information on the packages. With Living Doll I bake it at 130c or 275f, 15min per 6mm. The temp is the main thing, if you get that right you can cook and cook and it wont effect it (too hot and it burns, too low and it doesn’t cook right and can crack later). Now that I am doing larger full pieces I just use the Kitchen oven, and sometimes I have forgotten it and what should have only been 30min ended up 1 hour extra. But it was fine, as long as the temp is perfect. Regarding the toaster oven I would worry about heat spots, but if the pieces are small away from the elements it could be fine. But I would do a test on some bits of clay before trying it on anything you have spent time and love making. Hope that helps – Julie
Thank you so much for a stunning, stunning tutorial.
Thank you for your kind comment Michelle 🙂
Best tutorial I have read well done no hidden secrets new to polymer so was struggling with bits of information excluded from other tutorials I have read … Many thanks for your time and expertise putting these valuable tips on line regards Kathleen
You are most welcome Kathleen. I am always glad to hear that my tips have been of use to someone 🙂 Good luck with your scupltures!
Grata por compartilhar esse trabalho magnifico.
Muchas gracias por compartir y enseñarnos yo quisiera empezar a hacer algo pero tengo panico por lo de las medidas y proporciones, pero lo voy a intentar a ver que pasa, un saludo y de nuevo gracias.
You are most welcome 🙂
Love reading your tutorials.Thank you so much for sharing.